

Month view (default)
The page is organised by month:- Left bar: every captured month with a status (Ready, Open, Empty). Here you upload new months or enter them manually.
- Main area: the employee table for the selected month: amount and allocation to a cost center.
Overview (matrix)
On the Overview tab you still see the matrix of all employees × months, which helps when you compare several periods. Click a cell to edit the allocation.Export a CSV from DATEV Unternehmen Online
Personnel-cost data for Fyvel comes from DATEV Unternehmen Online. Each month, export the “Personalkostenübersicht” (personnel cost overview) report as a CSV file.Prerequisite: enable HR reports
Make sure that in DATEV Unternehmen Online, the menu at the top right (Meine Anwendungen / My applications) shows “Auswertungen Personalwirtschaft” (HR reports).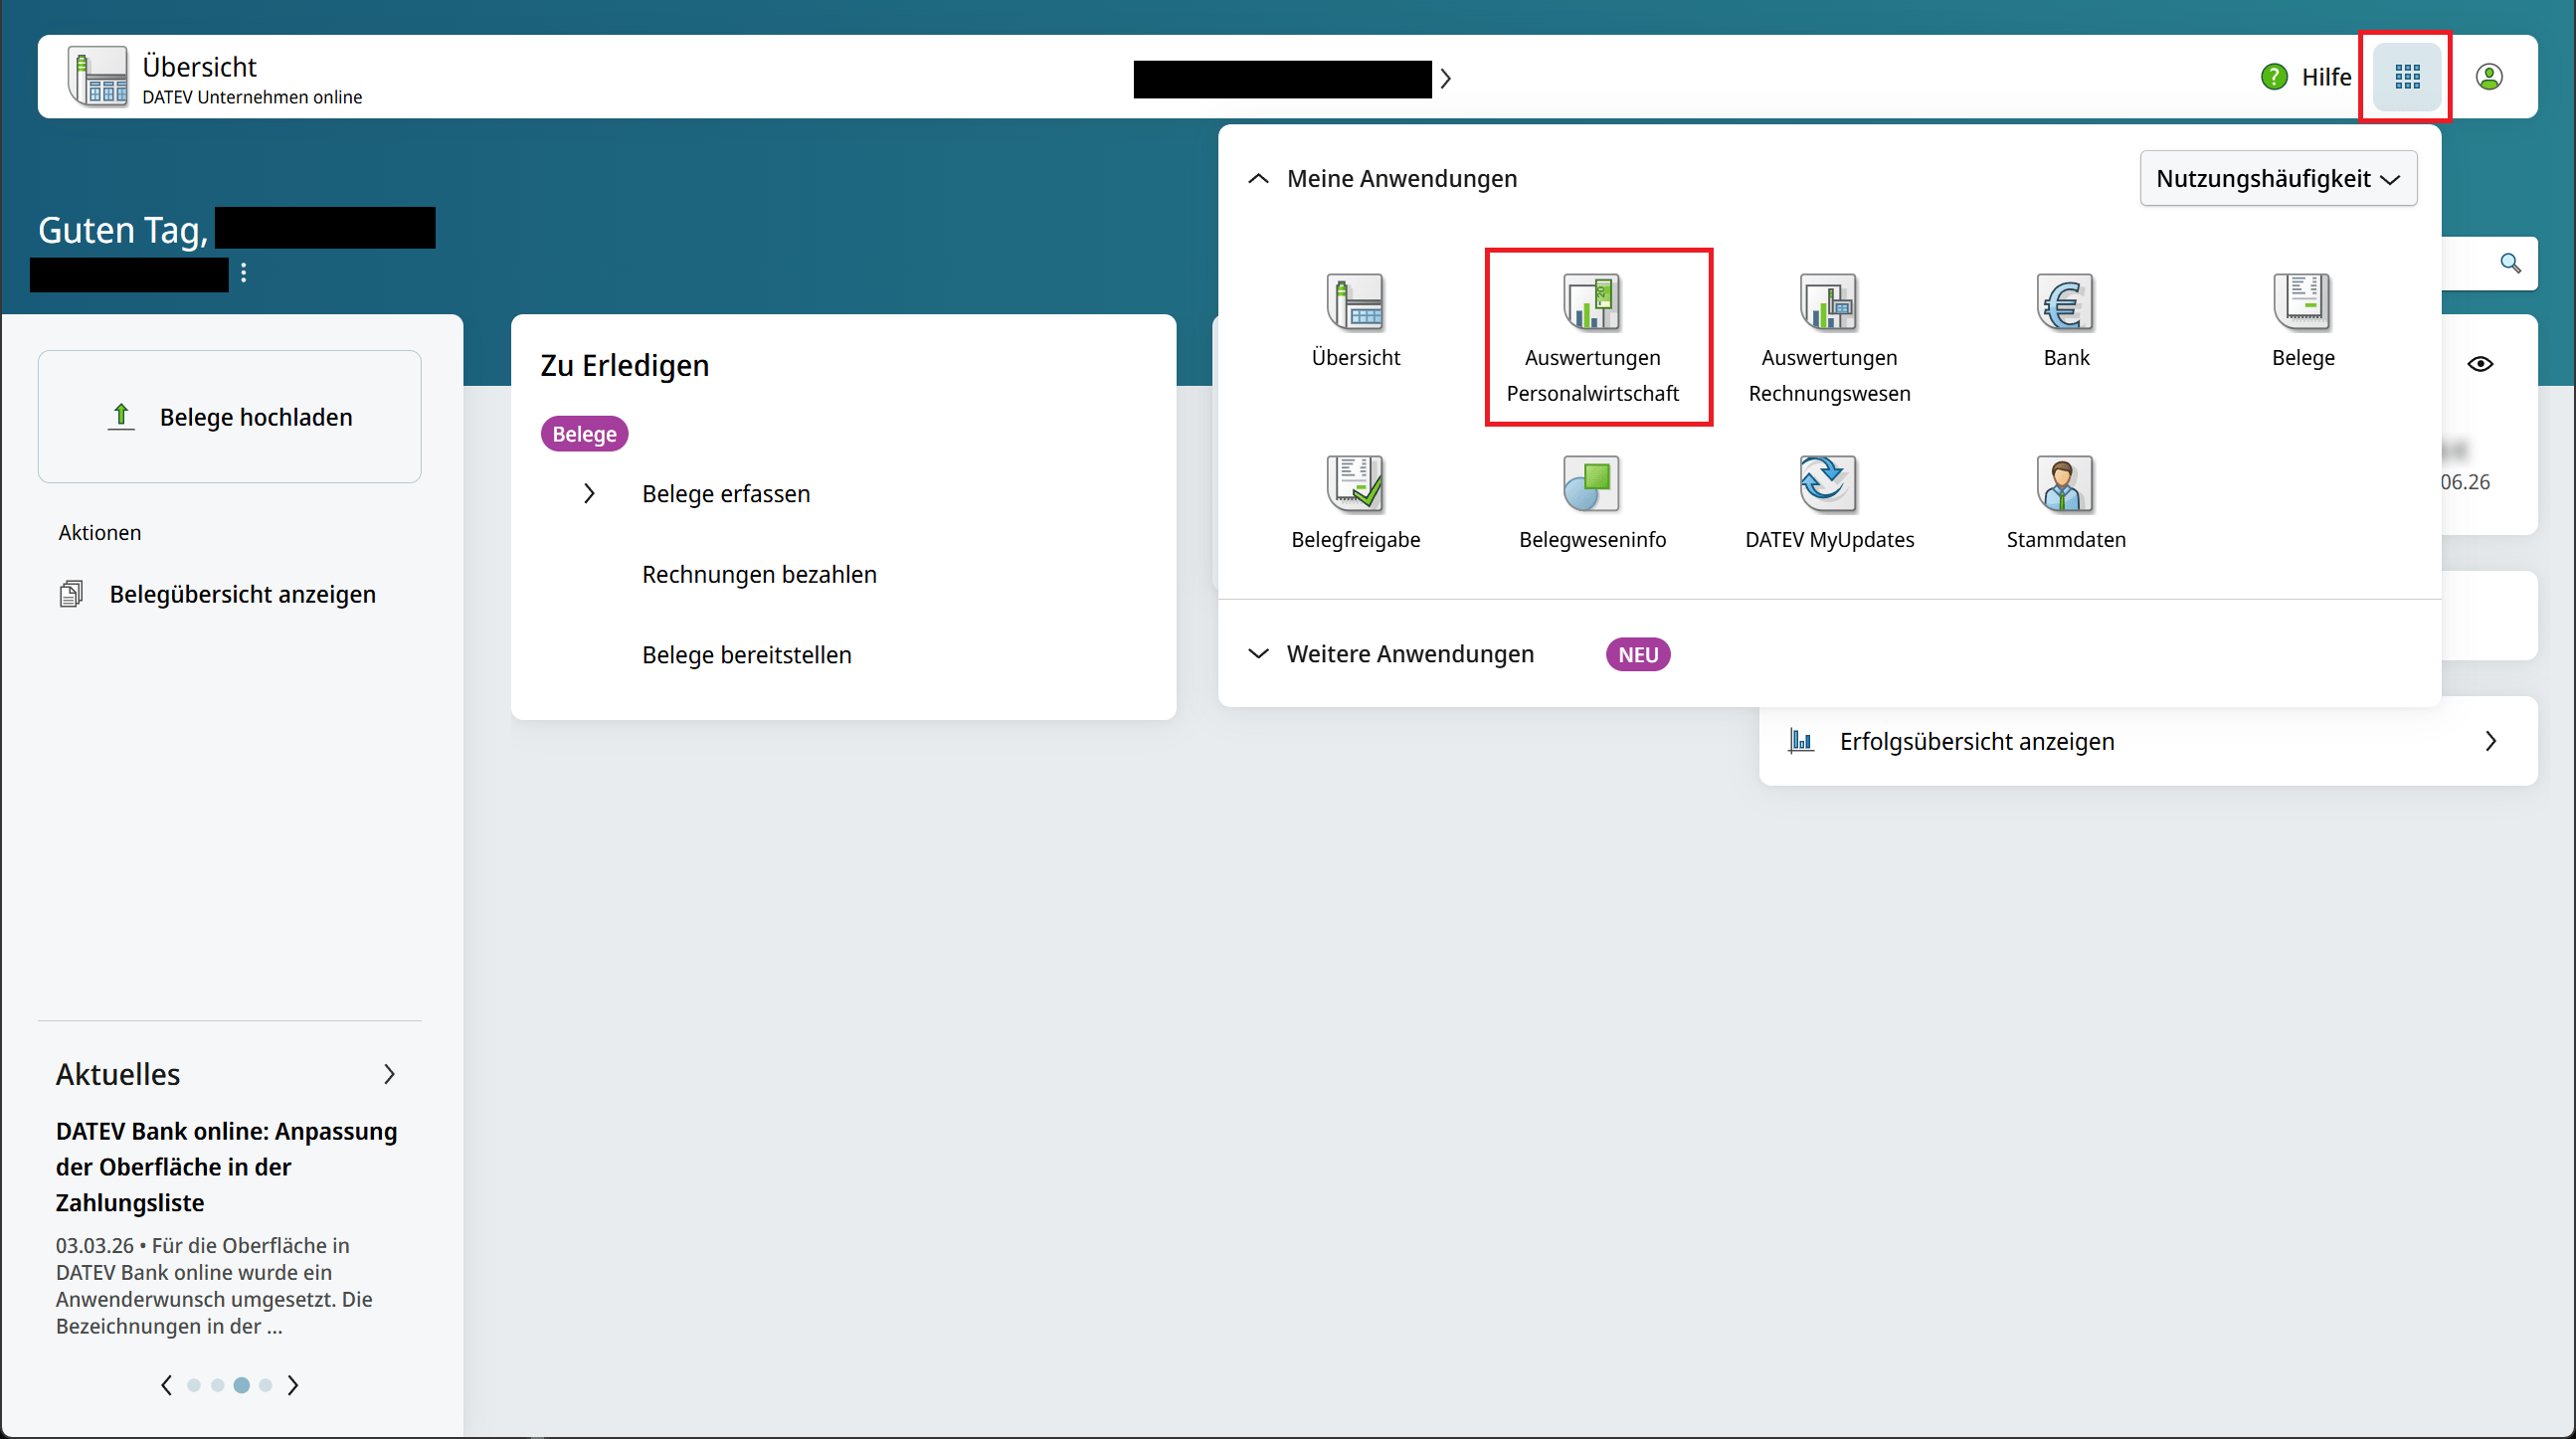
Open HR reports in DATEV Unternehmen Online
Download the personnel cost overview as CSV
Once Auswertungen Personalwirtschaft is available:- Open Auswertungen Personalwirtschaft from the menu at the top right.
- Switch to the Datenexport (data export) tab.
- Choose the month you want to capture in Fyvel.
- In the table, click the Personalkostenübersicht row.
- On the right, under CSV-Datei, download the file.
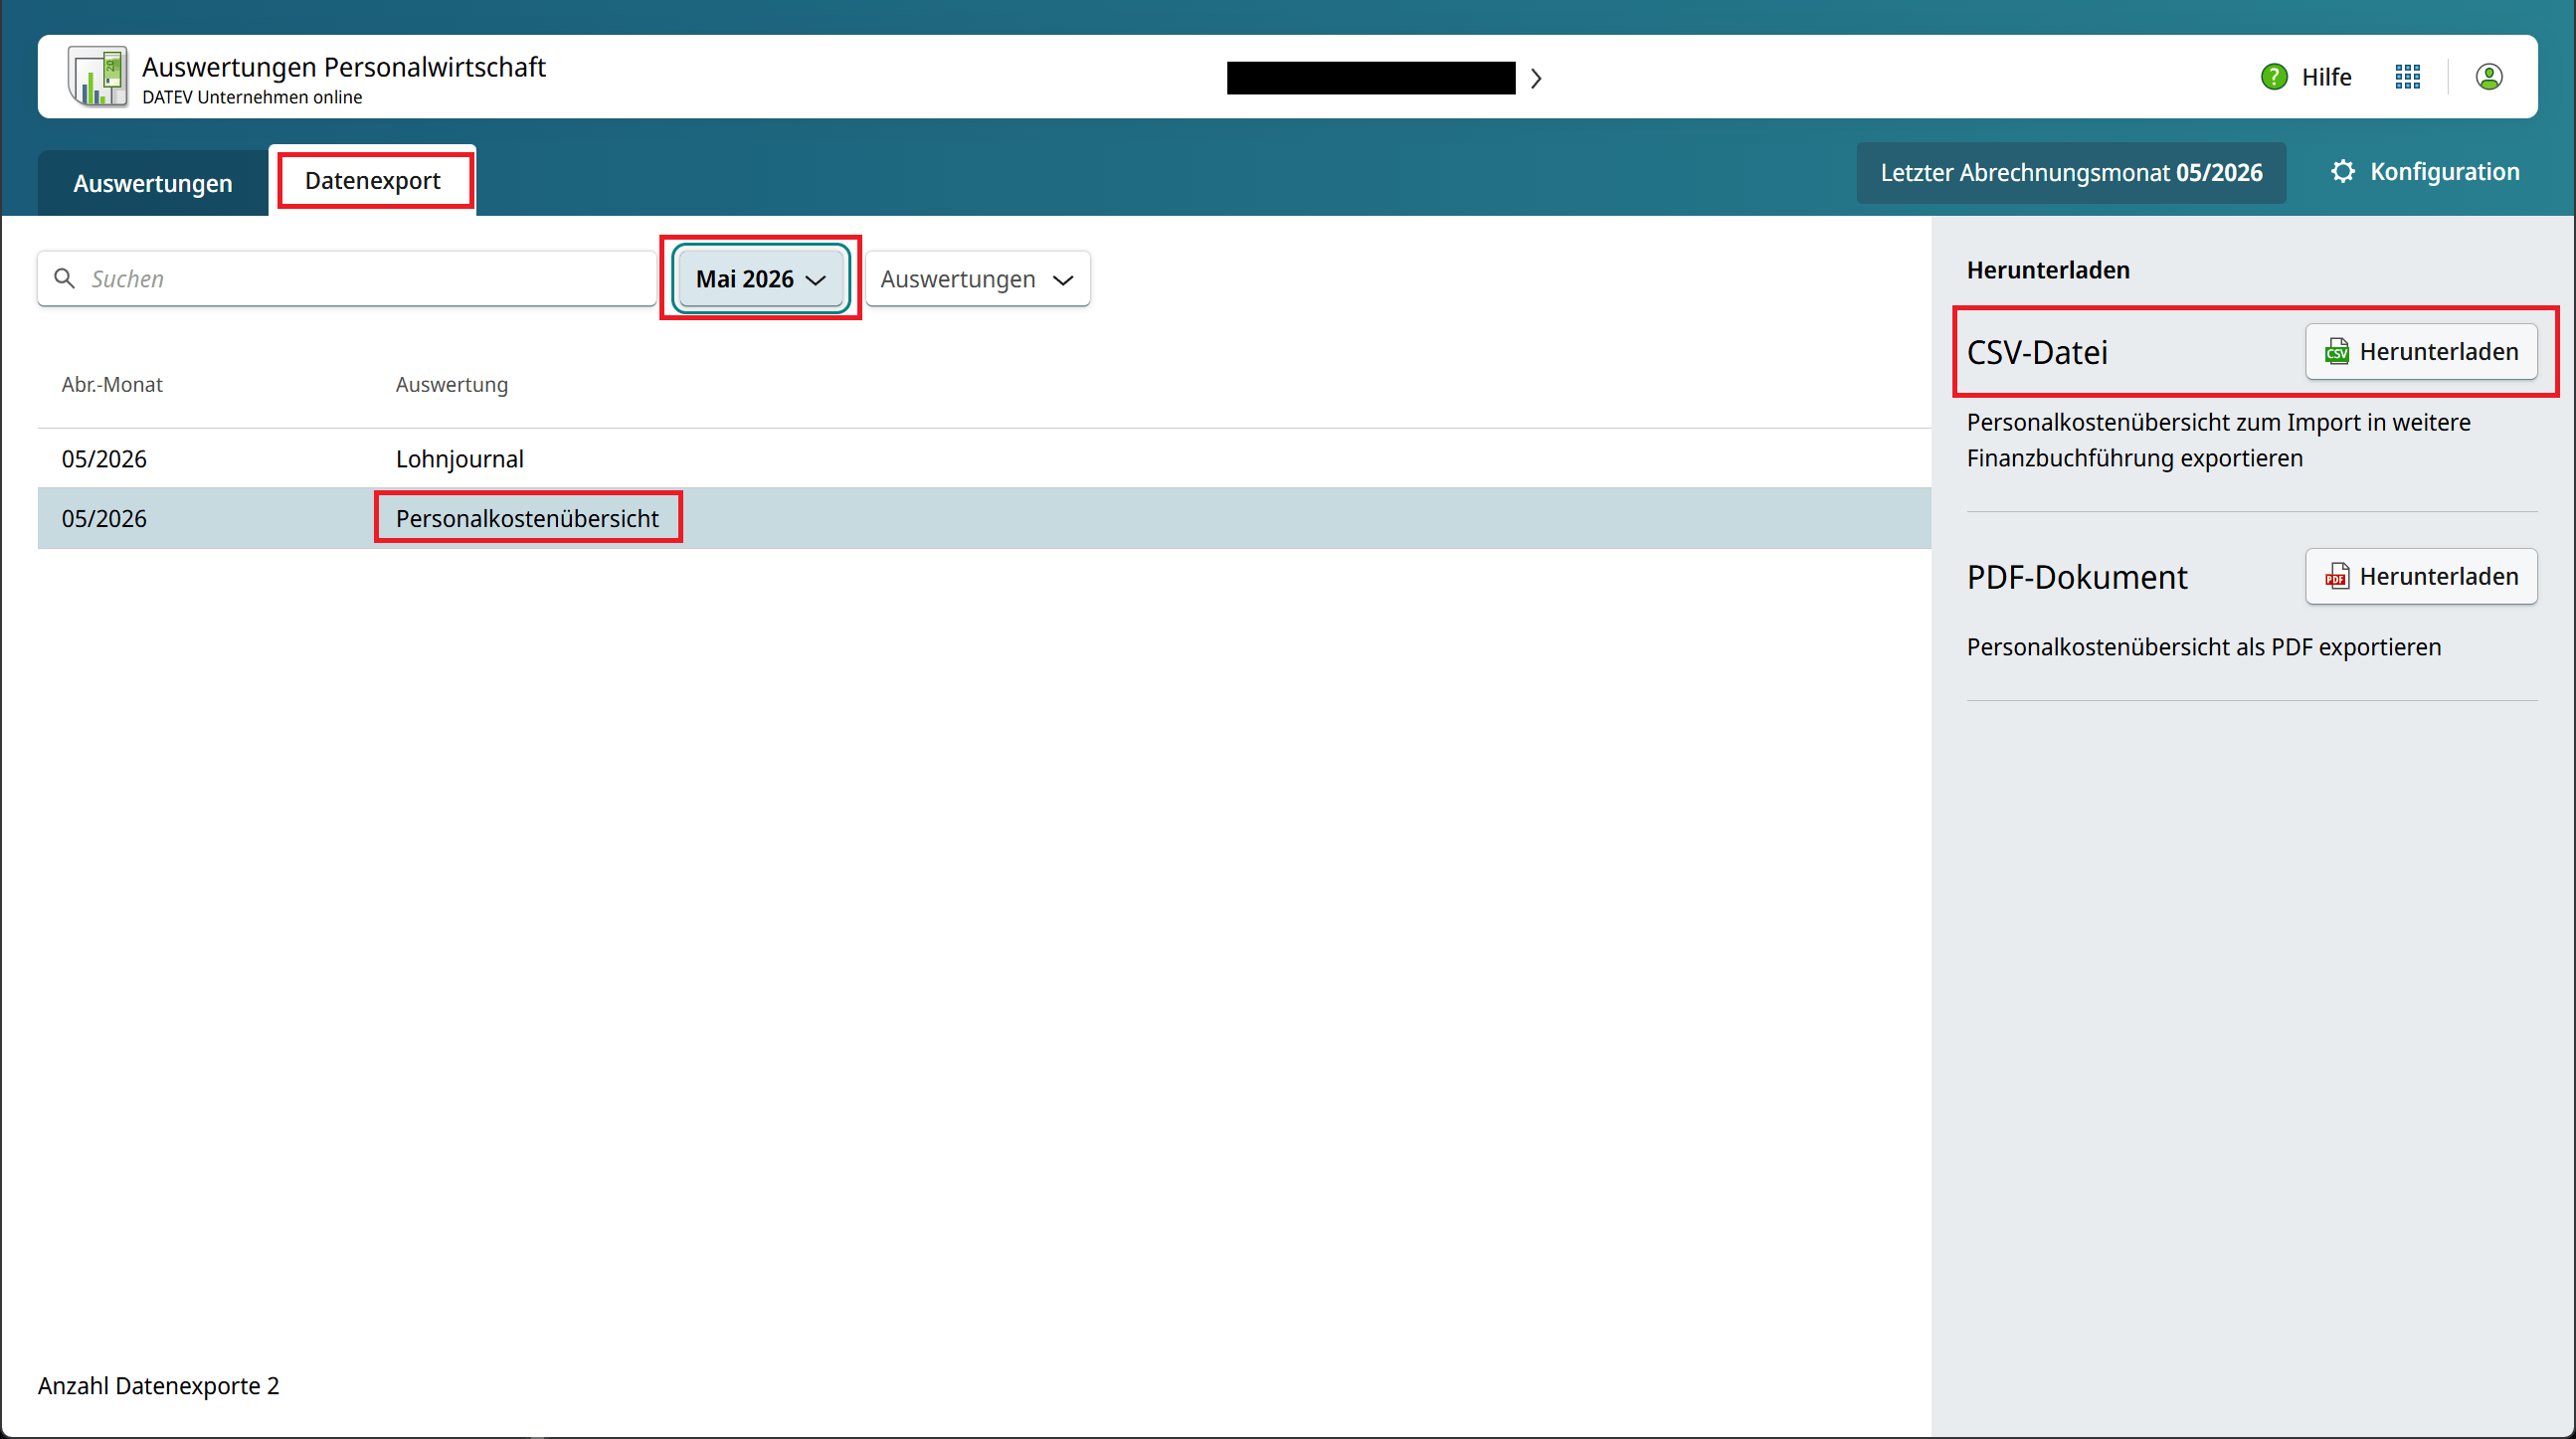
Export the personnel cost overview as CSV from DATEV
Upload month data
On the Personnel costs page, click Upload month (in the month bar or in the empty state) to import the exported CSV file. The upload has three steps:- Choose a file: upload the personnel cost overview CSV from DATEV.
- Map columns: map the columns of your file to the Fyvel fields (employee number, name, amount).
- Review & confirm: check the detected data and confirm the import.
Define the cost-center allocation
In the month view you edit the allocation via Edit allocation (pencil icon) on the row:- A side panel opens with the monthly amount.
- Add rows. Each row is a cost center (numeric code) and a percentage.
- The percentages must add up to exactly 100%.
- Click “Save”.
Fyvel then generates the matching reclassification bookings automatically.
Default allocation
For each employee you can store a default allocation. Click Default allocation (pencil icon next to the name) on the row, or the employee name in the overview.Delete an employee
An employee can be deleted when no month has personnel costs for them (Delete button on the row, or Delete employee in the default dialog). If the employee already has month data, delete is not available. When you create a new employee, you can set the default allocation immediately afterwards.Set a default for several employees
- Select employees in the table with the checkboxes (the header selects every visible row).
- Click Set default cost center.
- Set the cost-center split and save (it applies to every selected employee).
Automatic booking generation
When you save an allocation, Fyvel generates bookings automatically:- A reduction booking on the cost account (the total amount is posted out)
- Allocation bookings on the clearing account for each cost center (the proportional amounts)
Filter
In the month view:- Search employees: employee number or name
- Filter by default cost center: only employees whose default allocation contains a specific cost center
- Missing allocations only: only rows without an allocation in the active month
Delete a month
From the menu (⋯) next to a month in the left bar you can remove all personnel-cost data and the related bookings for that month.Prerequisite
Before allocations flow into reporting, the personnel-cost accounts must be configured in company settings:- Cost account: the account the personnel costs were originally posted to
- Clearing account: the account the reclassification bookings run through
- Posting texts: texts for the automatically generated bookings (with and without a cost center)