

Overview
This page describes the import from Xero: you export the General Ledger Detail report as an Excel file and upload it to Fyvel. An overview of every import path is on Uploads.Each upload fully replaces the previous Xero state of this company. The export must therefore cover the entire period you want to keep in Fyvel — not only the latest month. Categories you already assigned are kept, as long as the booking is in the export again.
Open the report
- In Xero, open Reporting.
- Under Taxes and balances, choose General Ledger Detail.
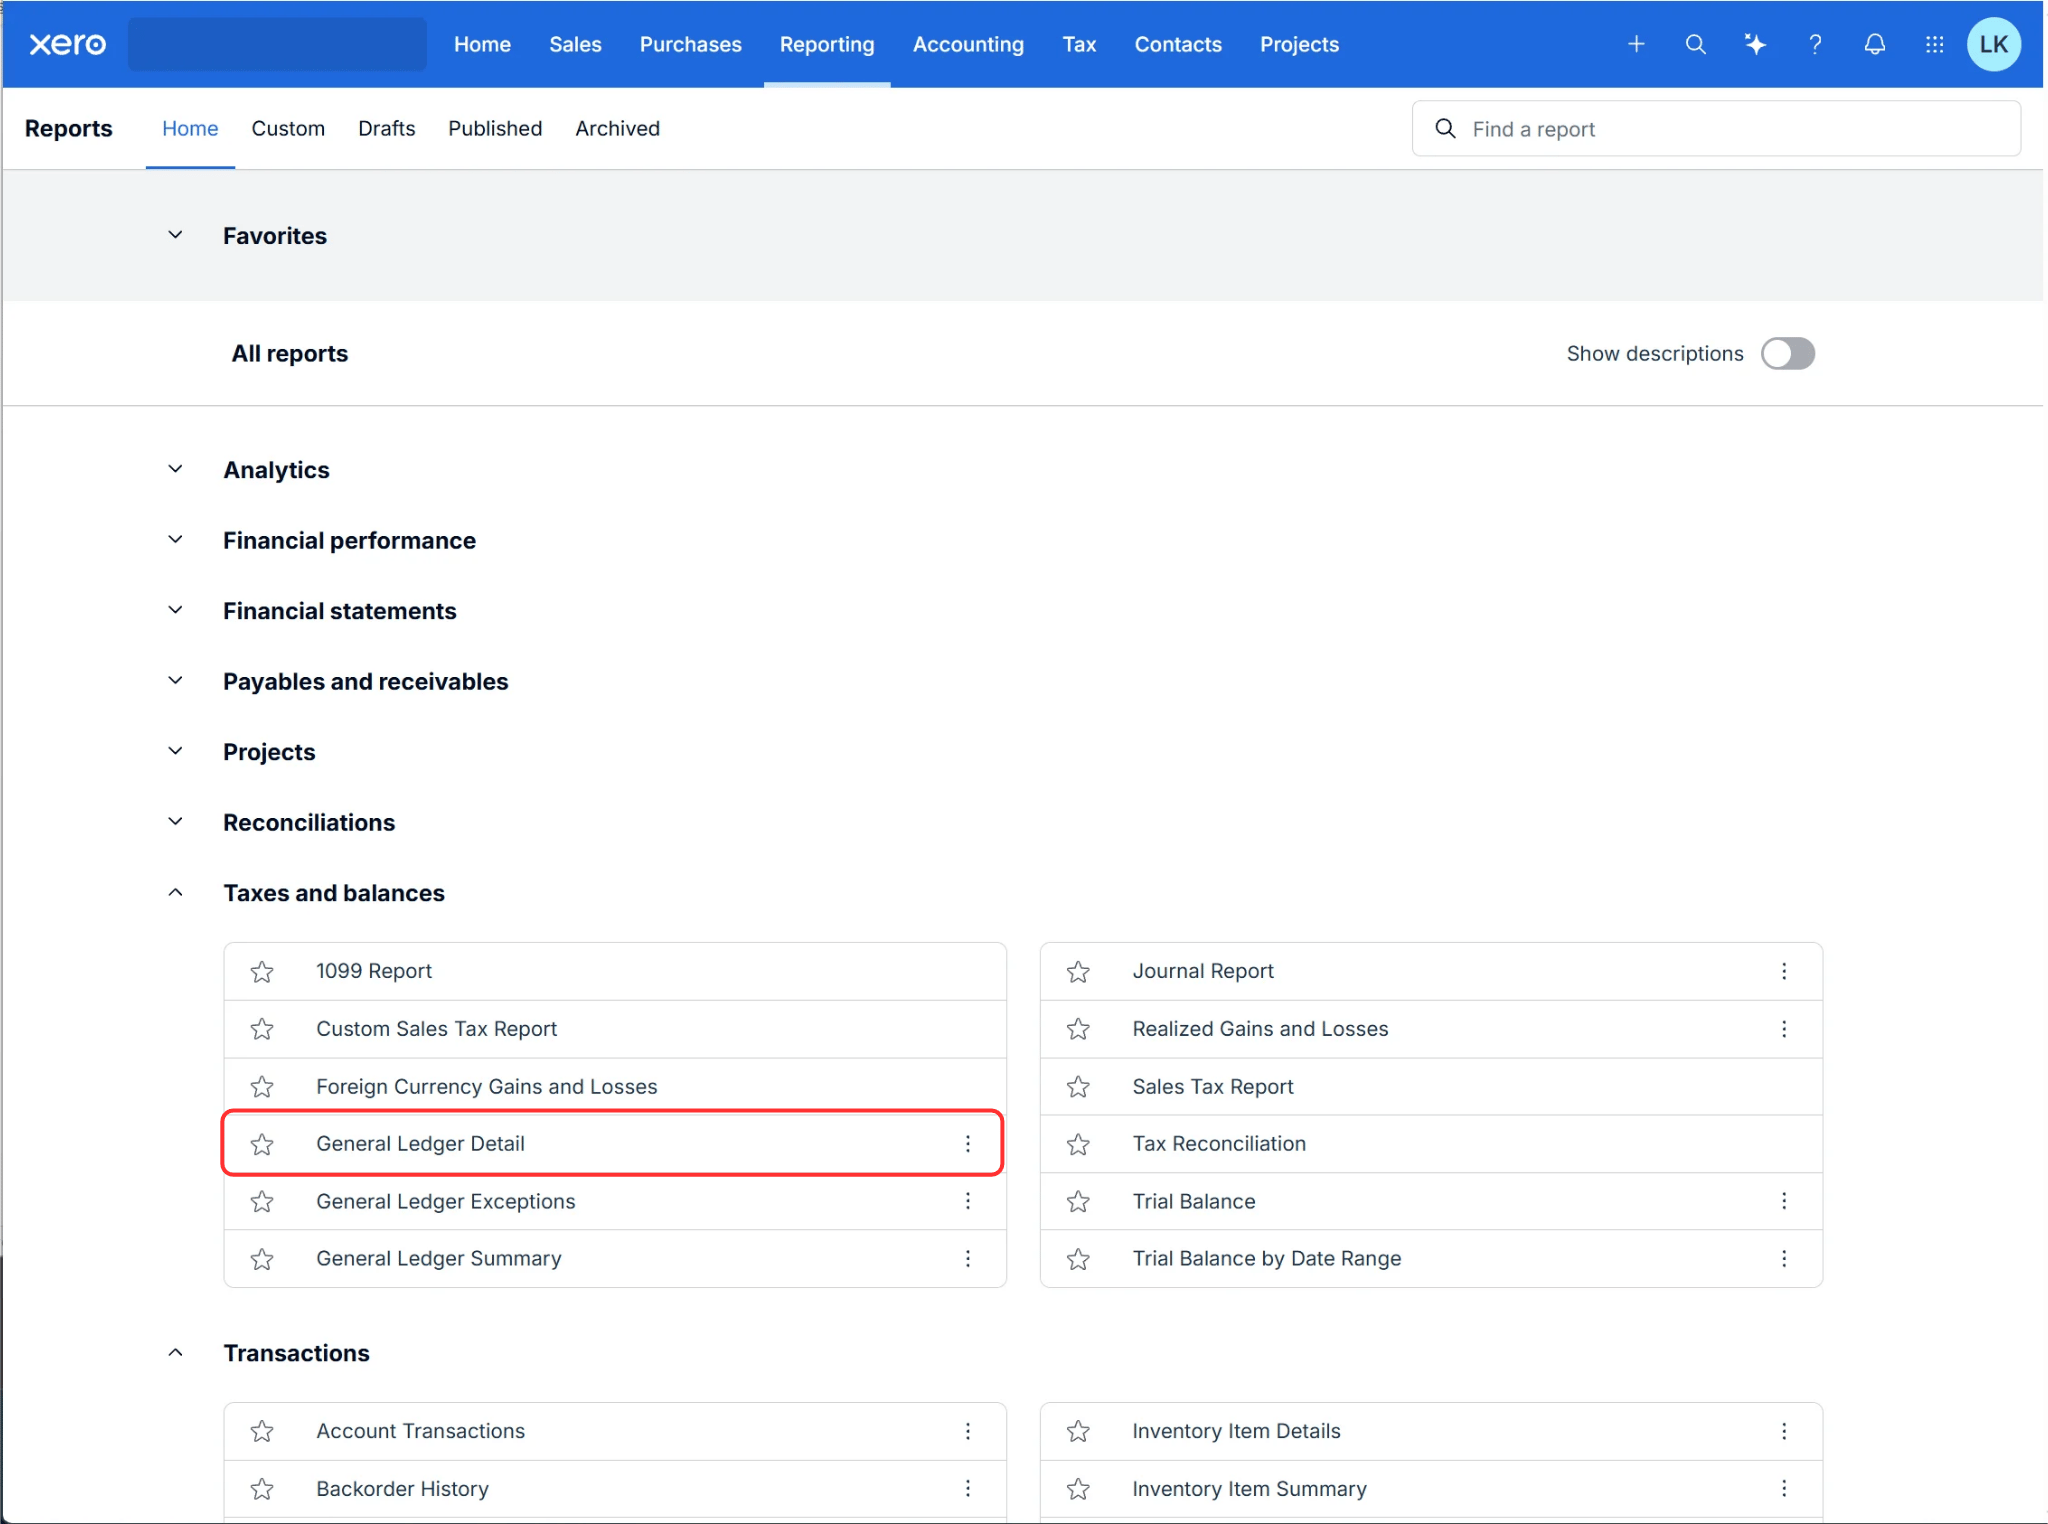
General Ledger Detail under Taxes and balances
Select all accounts
Under Accounts, click Select all. Every account must be in the export. If an account is missing, the bookings do not balance and Fyvel rejects the file.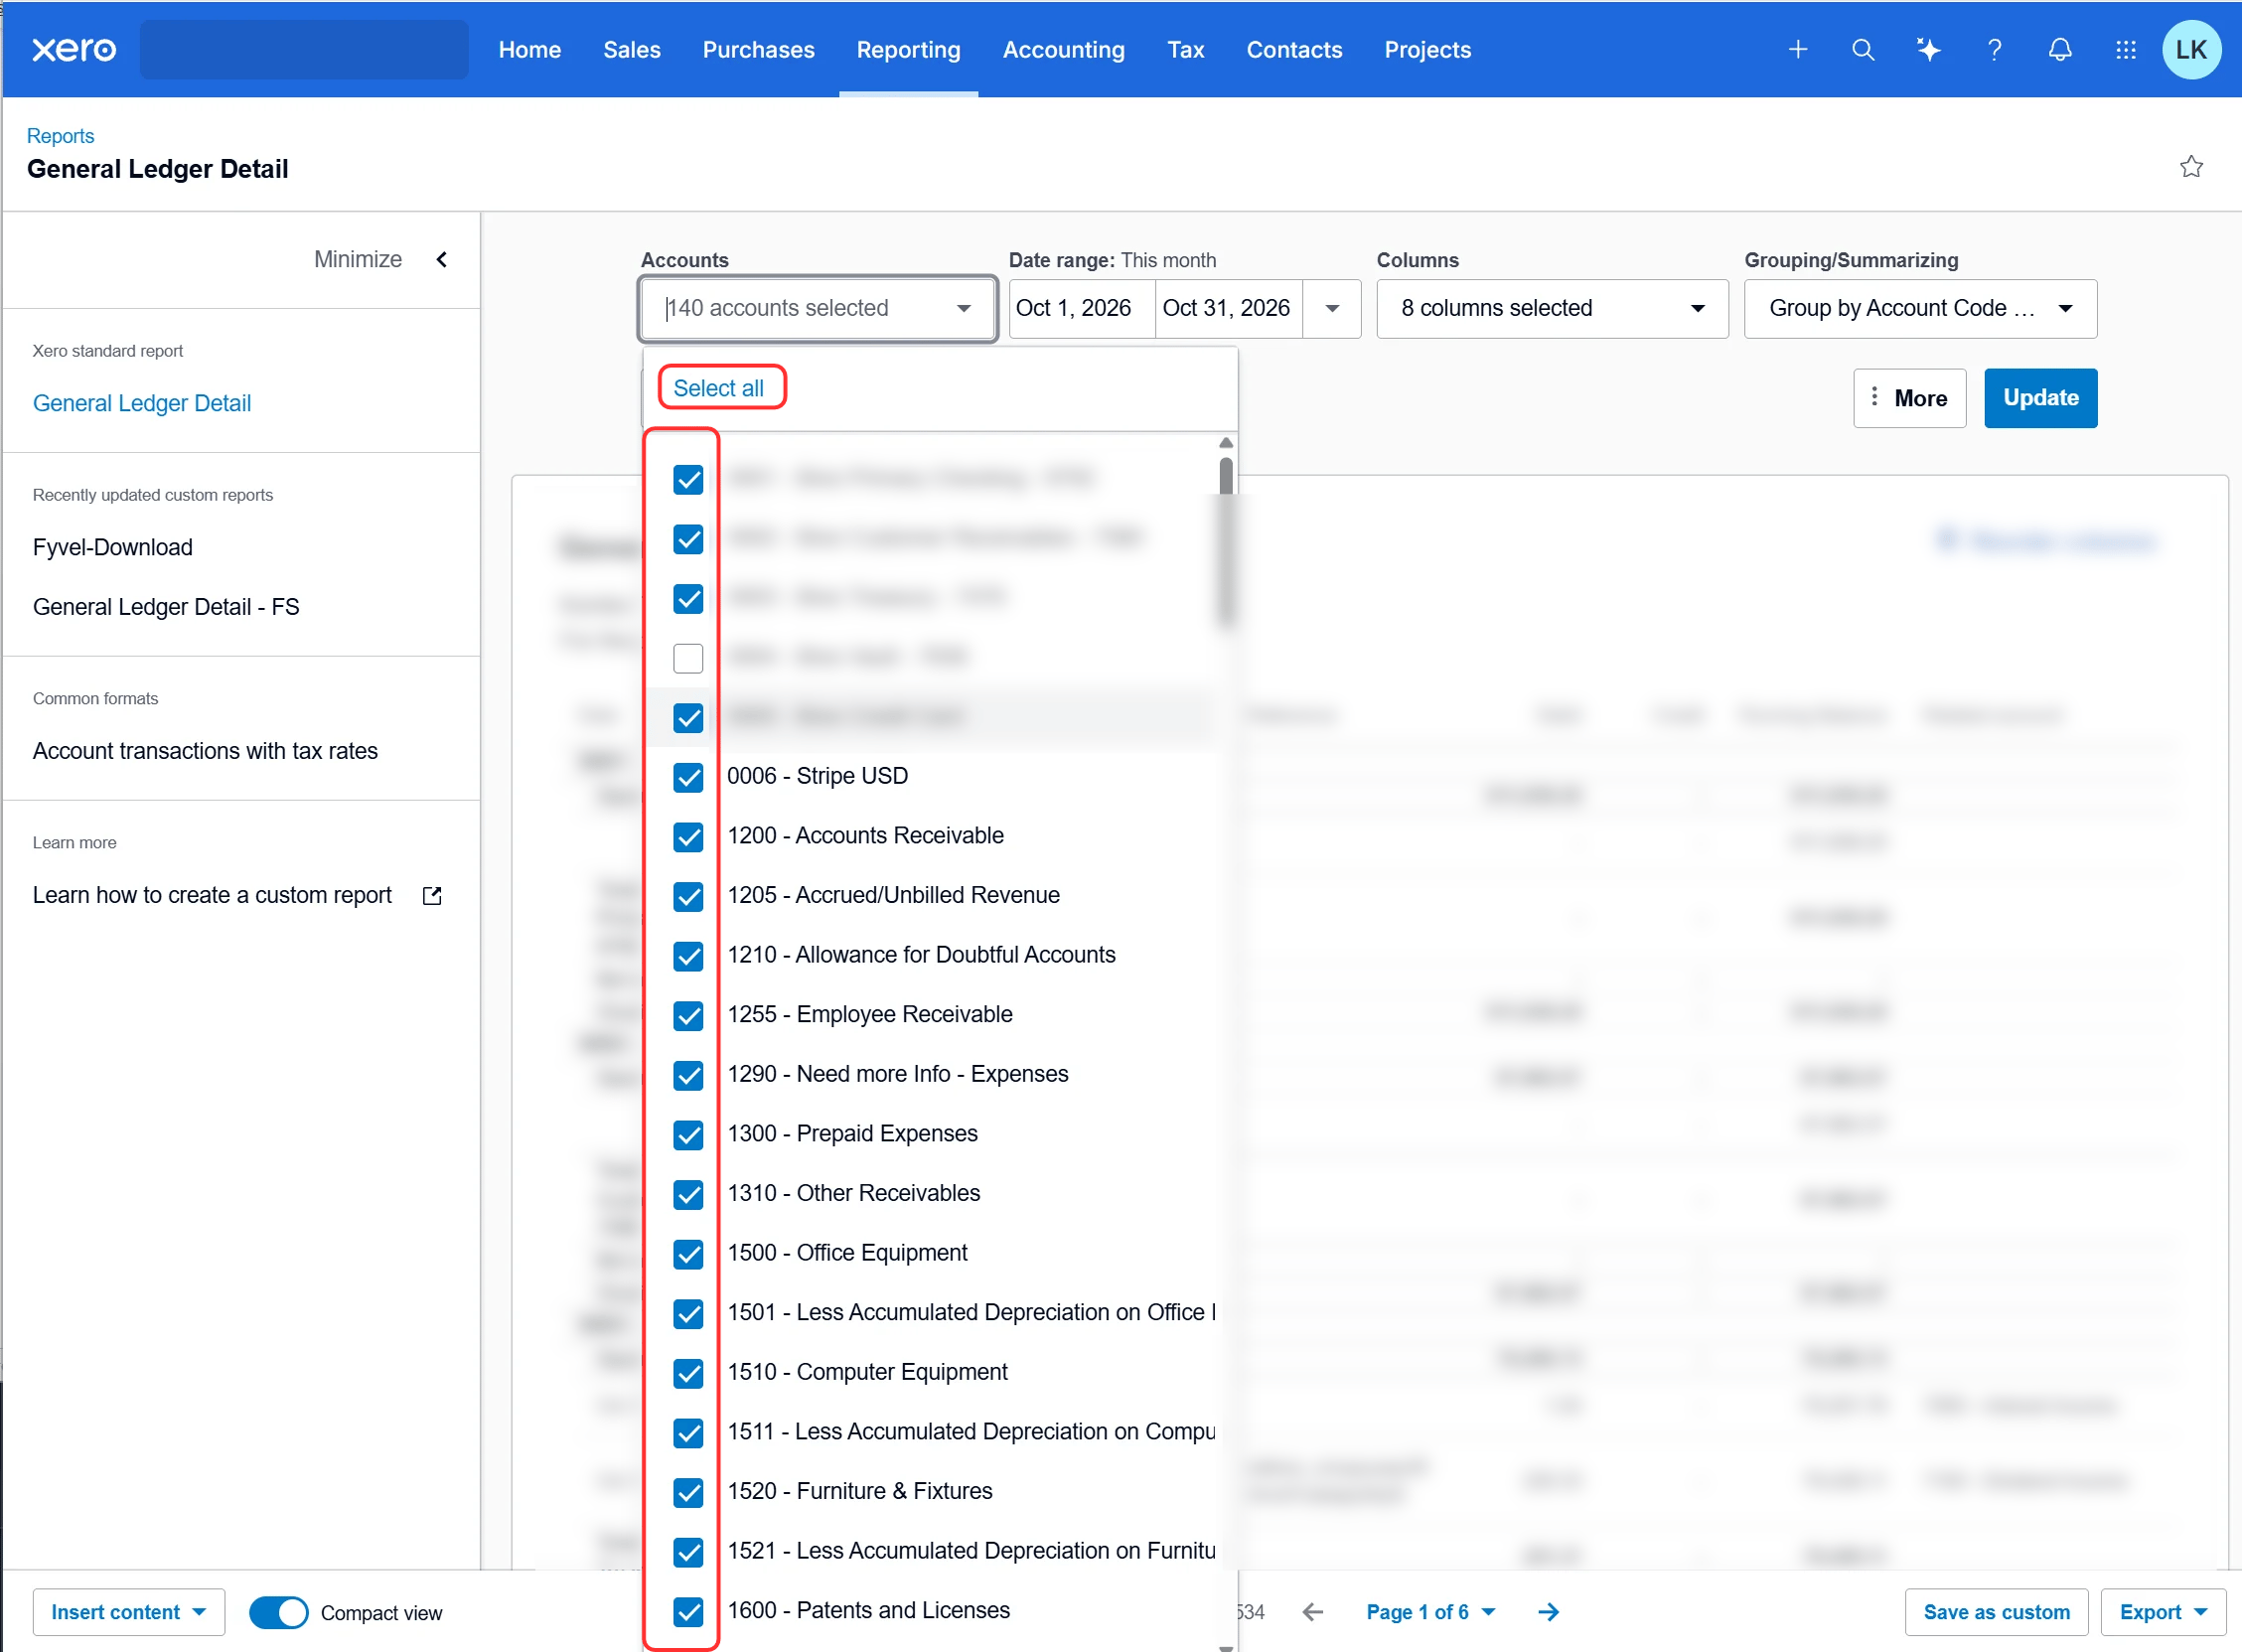
Select all accounts
Set the date range
Under Date range, choose the start and the end. Take the first month you want to report in Fyvel through the current month. After the change, click Update so the report shows the new range.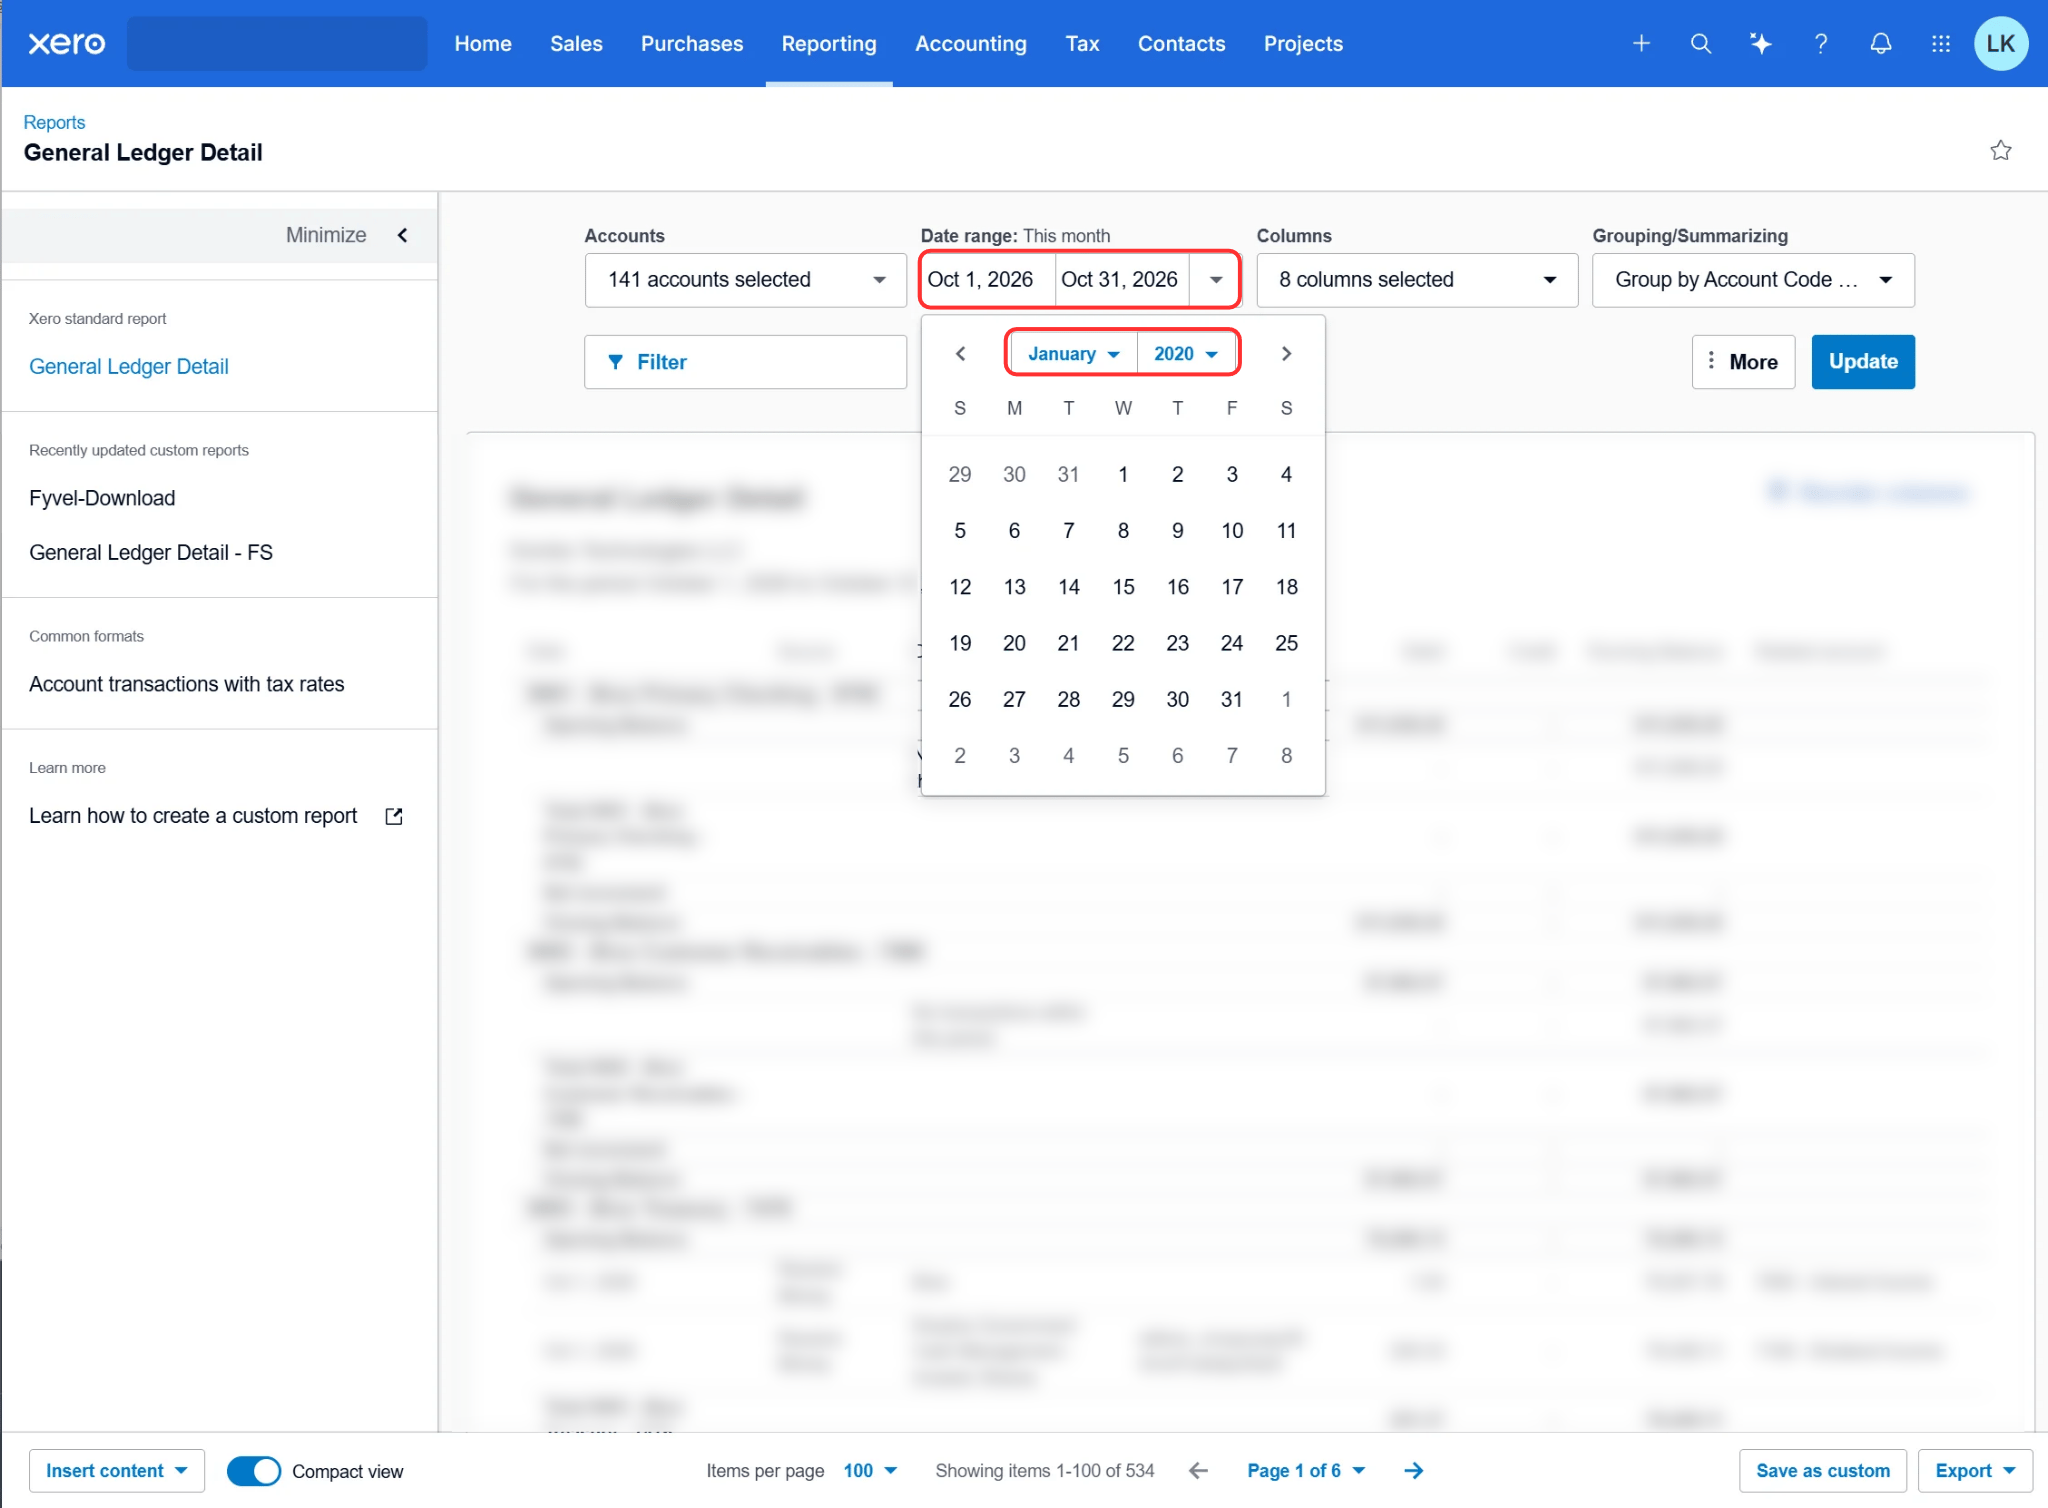
Date range from the start through today
Columns
Under Columns, tick every column shown in the screenshot:- Account, Account Code, Account Type
- Credit, Debit, Gross, Net
- Date, Description, Reference, Source
- Department
- Invoice Number, Journal ID, Related account
- Running Balance
- Tax, Tax Rate, Tax Rate Name
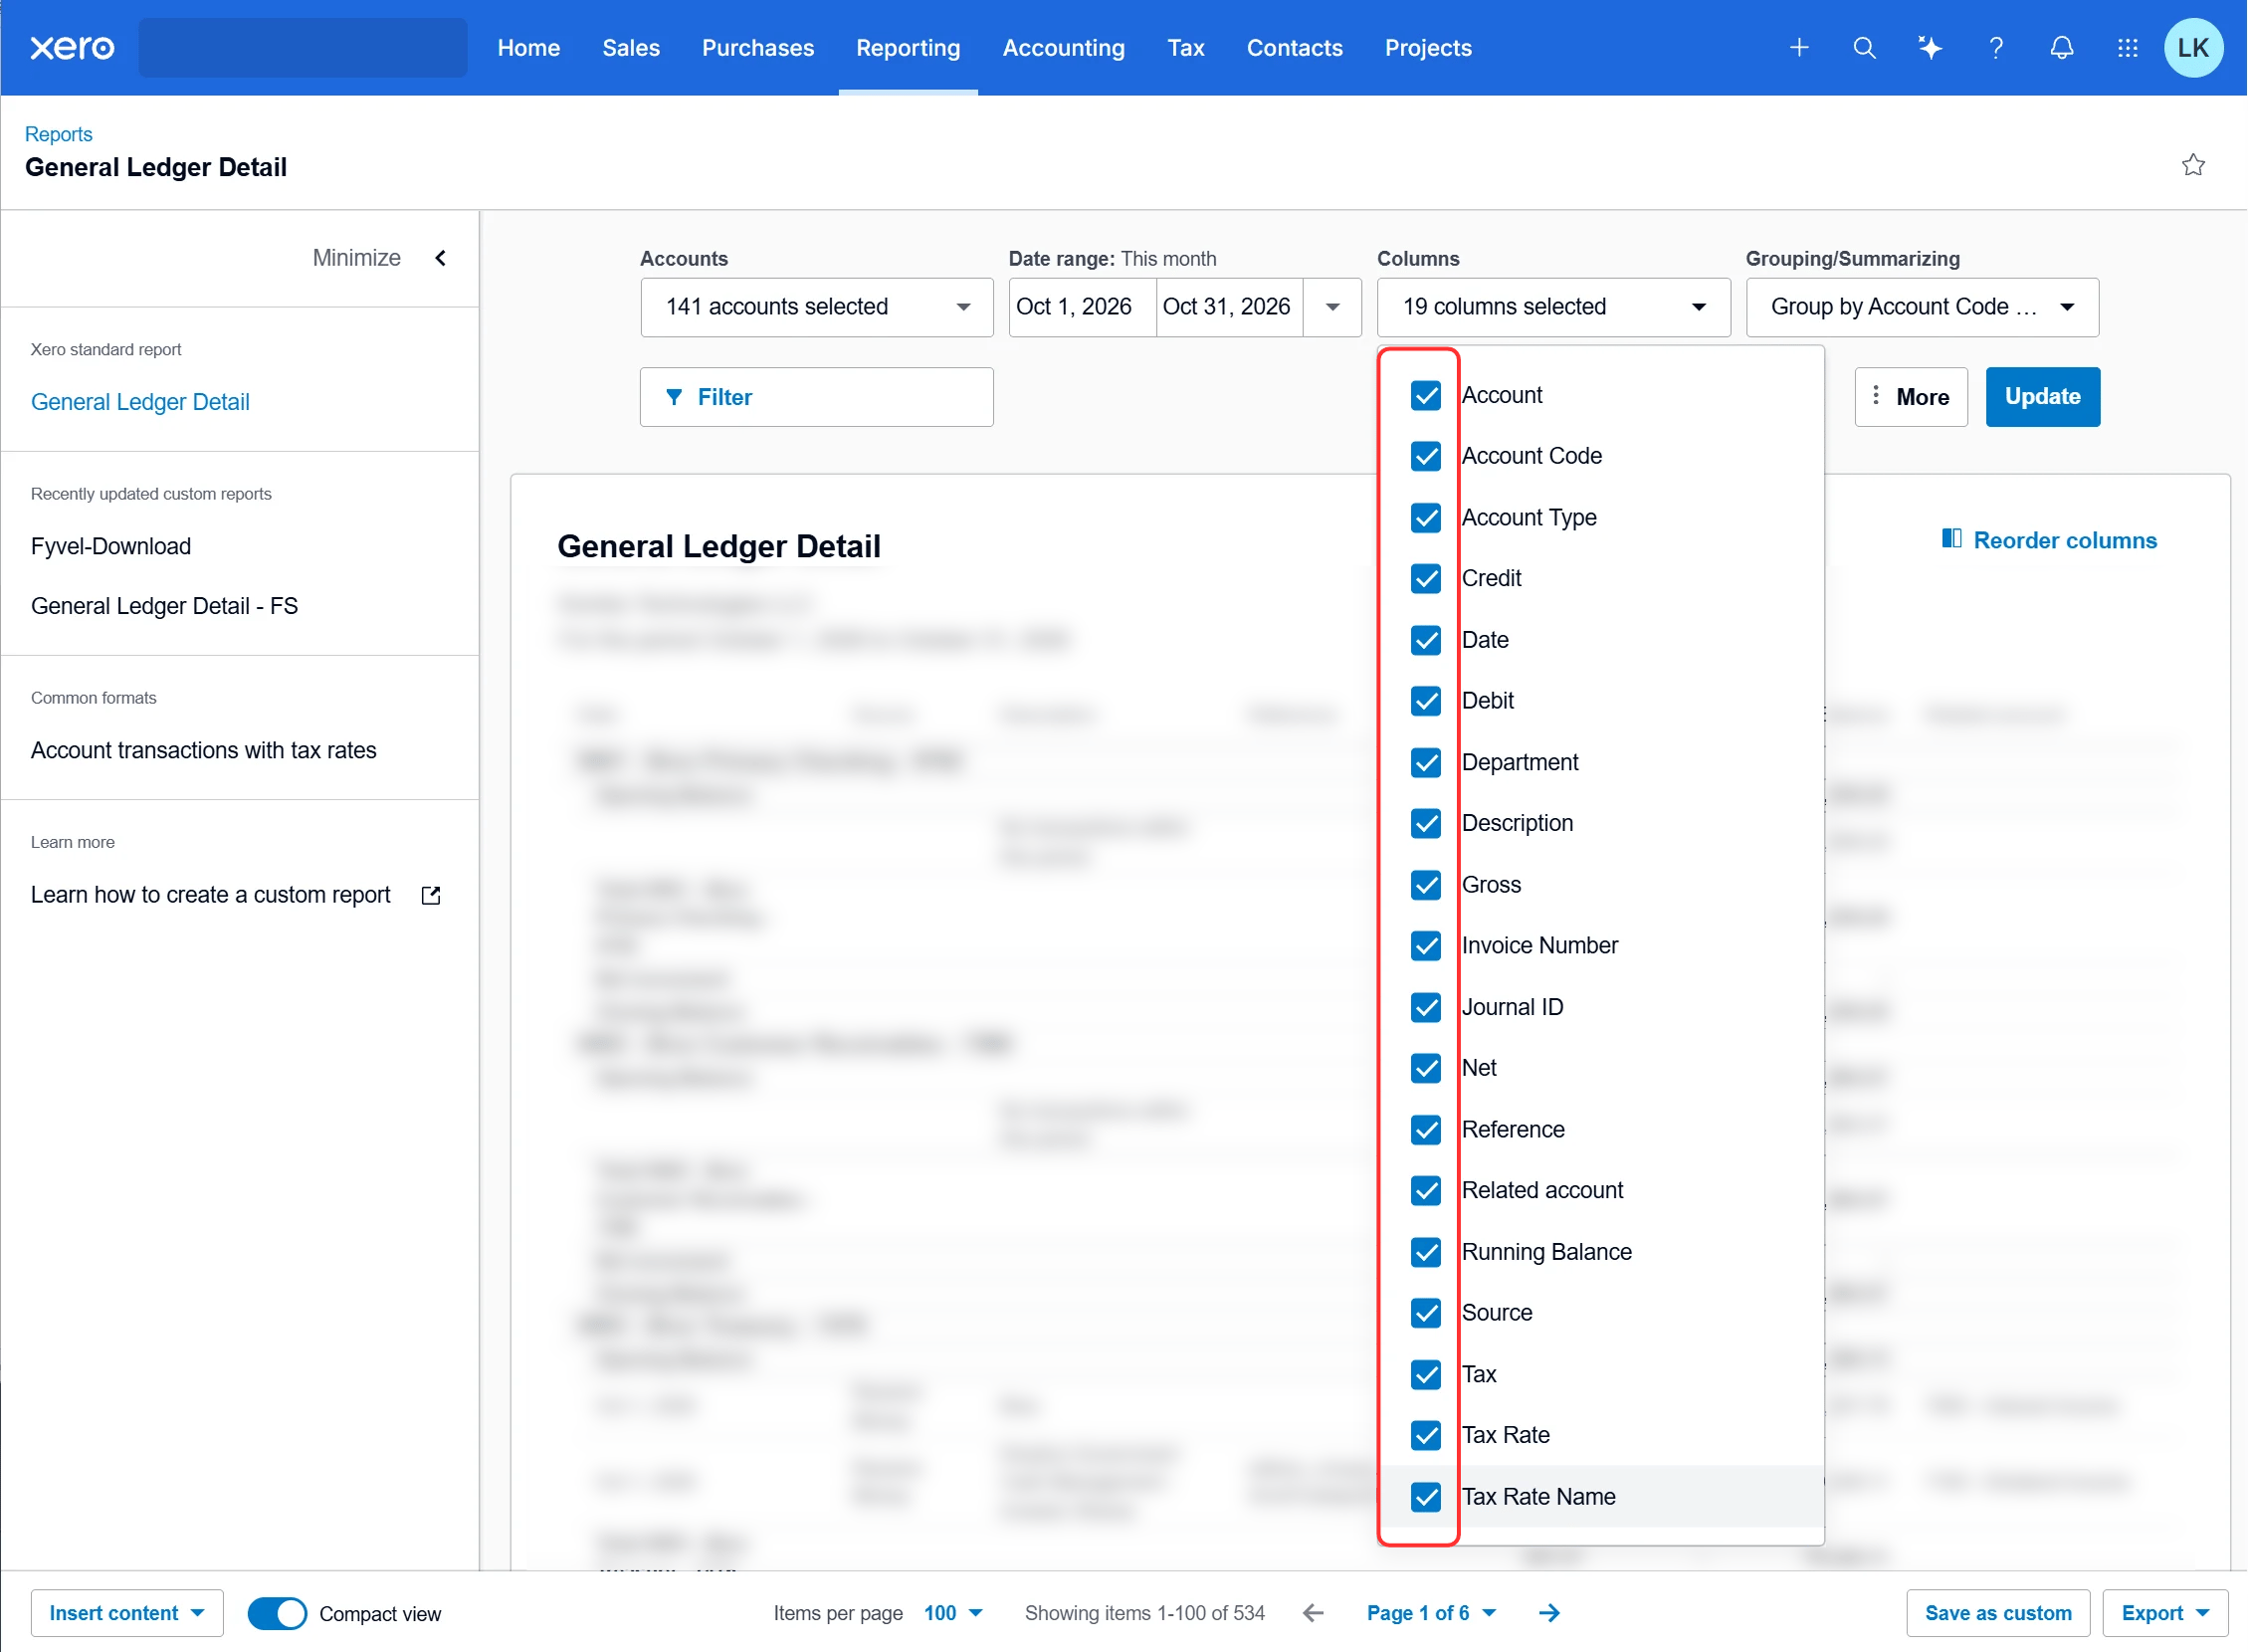
Select all columns
Do not group
Under Grouping/Summarizing, Group by must be None. Not Account or Account Code & Name, and not Summarize by. Otherwise the file contains total rows instead of the individual bookings.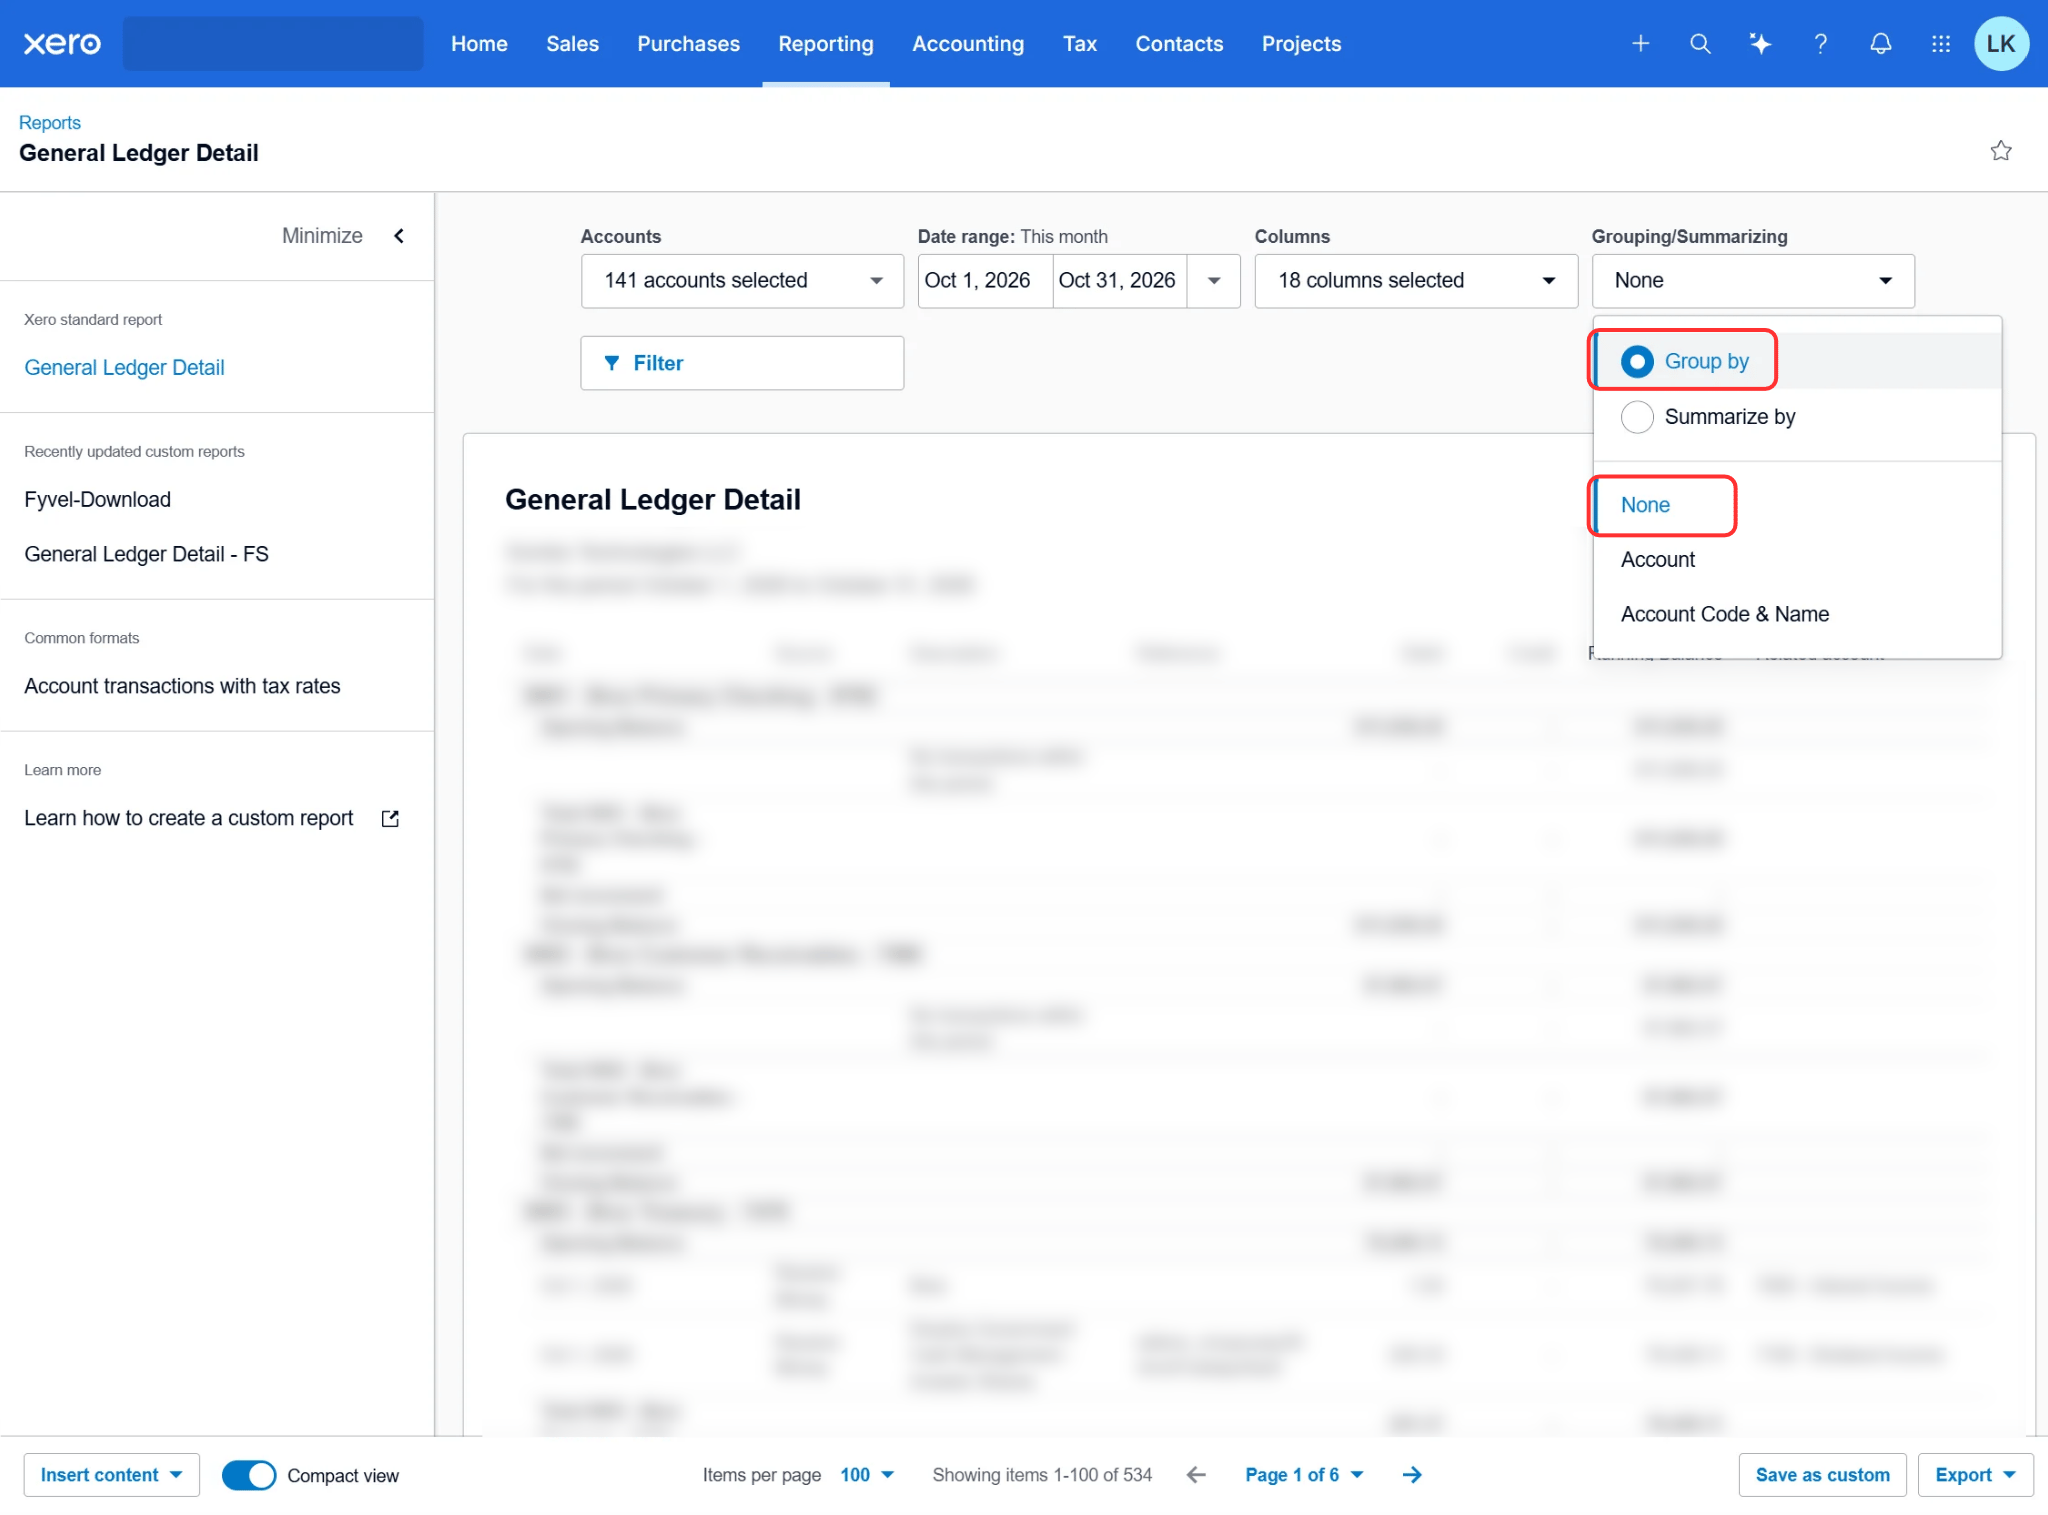
Group by set to None
Save as a custom report
At the bottom right, click Save as custom. Next time you open this report, set only the date range again. You do not have to configure accounts, columns, and grouping once more.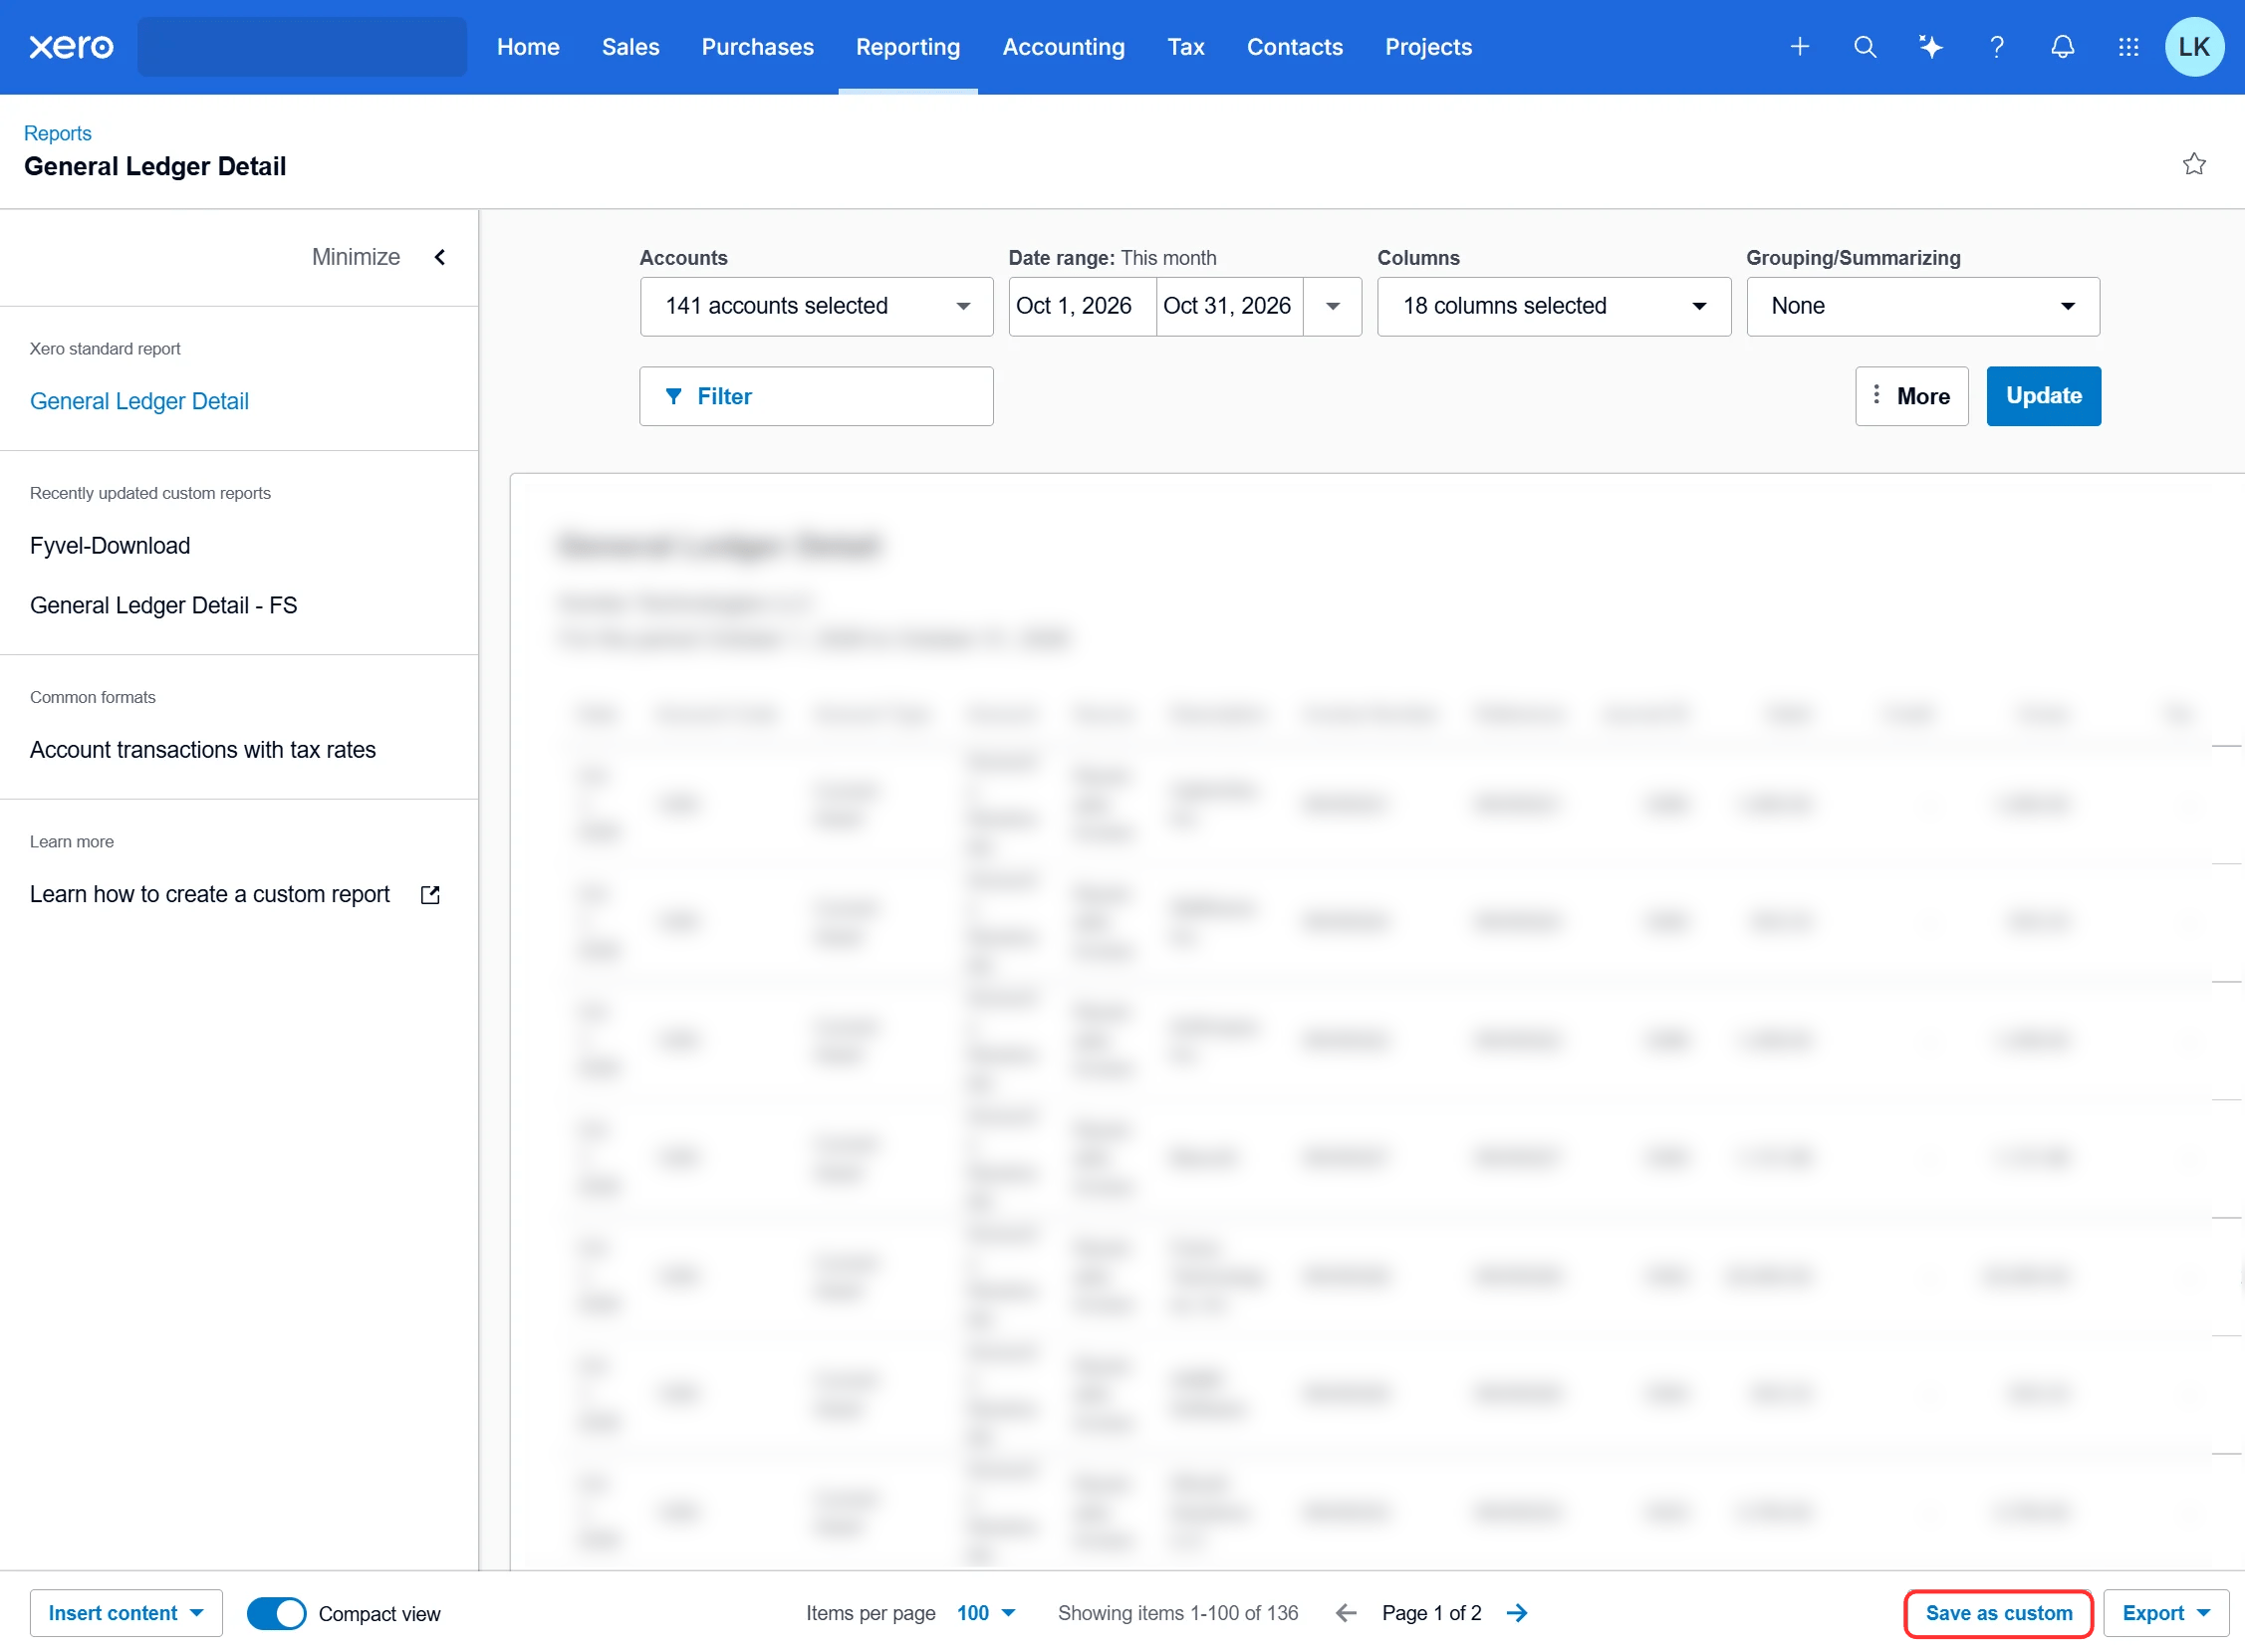
Save the report as a custom report
Download as Excel
- Check that Update shows the correct date range on the report.
- Export → Excel. Not PDF, and not Google Sheets.
.xlsx. It is always exactly one file per upload.
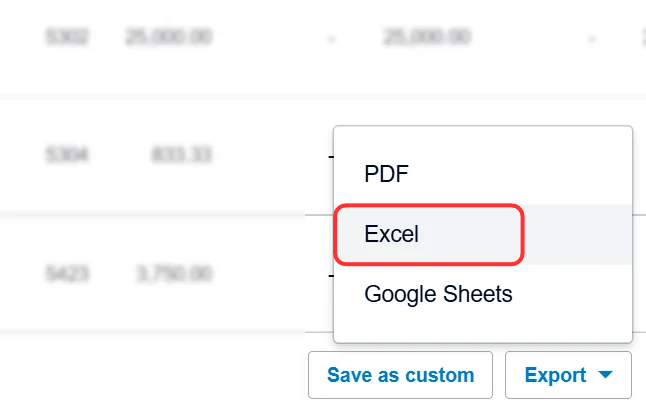
Export as Excel
Upload in Fyvel
- In Fyvel, open the Uploads page.
- Drag the Excel file into the upload area.
- Fyvel processes the file in the background. You see the status in the upload table.
Cost centers
If the export contains a column with departments or tracking categories (in the screenshot, Department):- Upload the file once. Fyvel remembers the labels from that column.
- Open Company settings → Xero integration.
- Enter the column name as the source column, for example
Department. - Map each label to a Fyvel cost center and save.
- Upload the same file again. Only this second upload writes the cost centers onto the bookings.