> ## Documentation Index
> Fetch the complete documentation index at: https://docs.fyvel.io/llms.txt
> Use this file to discover all available pages before exploring further.
# Getting started
> Step by step to your first report
### The onboarding checklist
When you create a new company in Fyvel, a checklist walks you through the main setup steps. That way everything is configured before you start working.
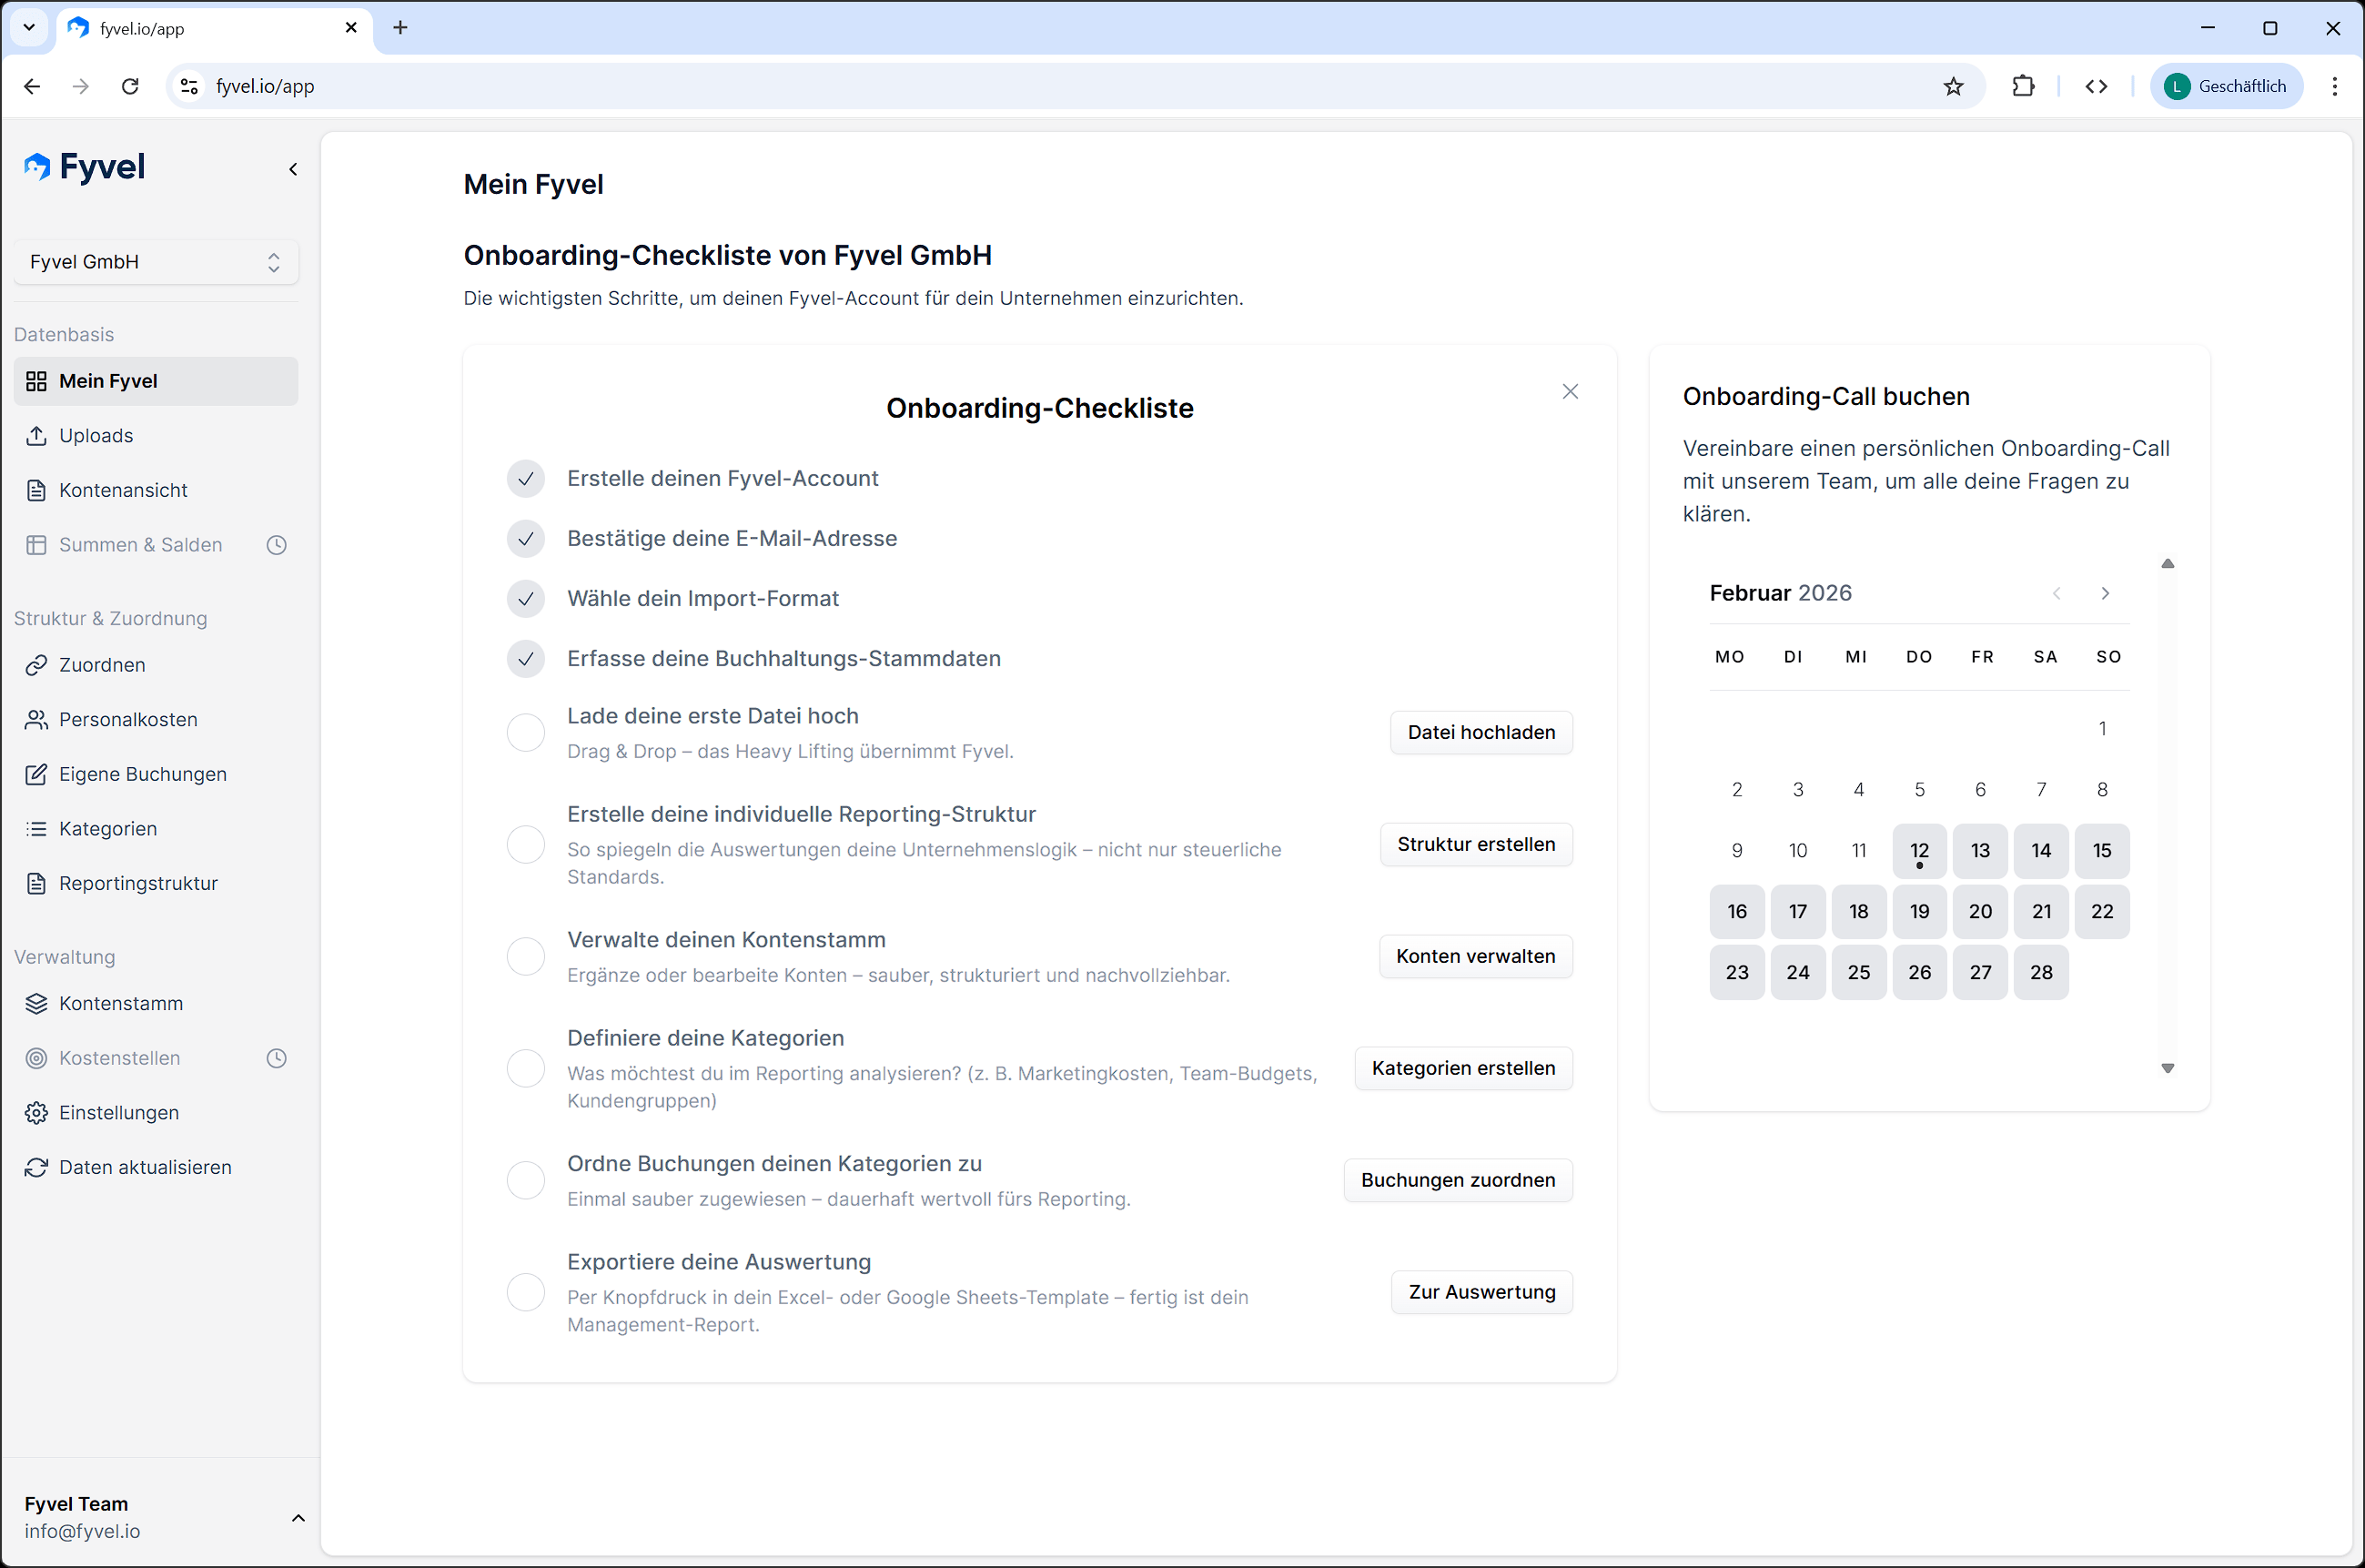 The checklist covers these steps:
1. **Create a Fyvel account** — register with email and password.
2. **Confirm your email address** — verify via the link in the confirmation email.
3. **Choose an import format** — decide how accounting data reaches Fyvel: DATEV Unternehmen Online, DATEV GDPdU, DATEV Connect, or Xero (see [Uploads](/en/documentation/getting-started/uploads)).
4. **Enter accounting master data** — DATEV client number, chart of accounts (SKR03 or SKR04), and account number length (4 or 6 digits).
5. **Upload the first file** — upload your first export.
6. **Create a reporting structure** — define how your accounts should be grouped for reporting.
7. **Manage the chart of accounts** — review and complete your accounts.
8. **Define categories** — create the categories you want to classify bookings with.
9. **Map bookings** — assign your categories to bookings.
10. **Export the report** — send the data to your Google Sheets or Excel template.
### Onboarding call
You can book a personal onboarding call with the Fyvel team at any time. Use the "Book a call" button on the onboarding page. In that conversation we answer open questions and help with setup.
### Finish onboarding
Once you have completed every step (or earlier, if you are comfortable), you can finish onboarding. After that, the dashboard with your financial overview replaces the checklist.
### Typical first-time flow
1. Register and confirm your email
2. Configure the import format and DATEV master data
3. Download the first export (see the page for your import path under "Uploads")
4. Upload the file in Fyvel
5. Review the chart of accounts, classify new accounts, and mark them as tracked
6. Create a reporting structure, with sections such as "Revenue" or "Personnel costs"
7. Create categories, for example "Cloud infrastructure" or "Consulting"
8. Map bookings, assigning categories on the Mapping page
9. Export data to Google Sheets or Excel
***
This documentation is built and hosted on [Mintlify](https://mintlify.com), a developer documentation platform.
The checklist covers these steps:
1. **Create a Fyvel account** — register with email and password.
2. **Confirm your email address** — verify via the link in the confirmation email.
3. **Choose an import format** — decide how accounting data reaches Fyvel: DATEV Unternehmen Online, DATEV GDPdU, DATEV Connect, or Xero (see [Uploads](/en/documentation/getting-started/uploads)).
4. **Enter accounting master data** — DATEV client number, chart of accounts (SKR03 or SKR04), and account number length (4 or 6 digits).
5. **Upload the first file** — upload your first export.
6. **Create a reporting structure** — define how your accounts should be grouped for reporting.
7. **Manage the chart of accounts** — review and complete your accounts.
8. **Define categories** — create the categories you want to classify bookings with.
9. **Map bookings** — assign your categories to bookings.
10. **Export the report** — send the data to your Google Sheets or Excel template.
### Onboarding call
You can book a personal onboarding call with the Fyvel team at any time. Use the "Book a call" button on the onboarding page. In that conversation we answer open questions and help with setup.
### Finish onboarding
Once you have completed every step (or earlier, if you are comfortable), you can finish onboarding. After that, the dashboard with your financial overview replaces the checklist.
### Typical first-time flow
1. Register and confirm your email
2. Configure the import format and DATEV master data
3. Download the first export (see the page for your import path under "Uploads")
4. Upload the file in Fyvel
5. Review the chart of accounts, classify new accounts, and mark them as tracked
6. Create a reporting structure, with sections such as "Revenue" or "Personnel costs"
7. Create categories, for example "Cloud infrastructure" or "Consulting"
8. Map bookings, assigning categories on the Mapping page
9. Export data to Google Sheets or Excel
***
This documentation is built and hosted on [Mintlify](https://mintlify.com), a developer documentation platform.